Saturday, March 27, 2010

Encrypted Thumb Drive

I've been using TrueCrypt for a long time but I use it as an exception rather than the default on my thumb drive. What I was seeking was to setup a thumb drive so that it would always be encrypted yet be as simple to use as possible.

I think I ended up with a pretty good solution.

I used PStart that I had used earlier. This time though I used the startup and exit features.

To get PStart running, I created an autorun.inf file on the thumb drive.

[autorun]
open=PStart.exe -autorun
icon="PStart.exe"
action=Thumb Drive Menu
label=Your Name

This causes an entry to be presented at the top of the Autorun menu (unless it is disabled) asking if you want to start the "Thumb Drive Menu."

Within PStart, I setup an entry called "Mount My Documents." This entry invokes TrueCrypt with command line switches set to automatically mount the volume as drive T: and not display the TrueCrypt window. This was specified to run at PStart startup.

Another entry was created and called "Dismount My Documents." Similarly this entry invokes TrueCrypt with command line switches set to automatically dismount any volumes TrueCrypt has mounted and not display the TrueCrypt window. This was specified to run at PStart exit.

The above makes the whole thing work. When you insert the thumb drive, if you have Autoplay enabled, you get the Autoplay menu asking if you want to run "Thumb Drive Menu." You click on it and PStarts runs TrueCrypt. TrueCrypt prompts you for the password for the encrypted volume. You enter the password and the encrypted volume is mounted as T:. When you close the PStart menu, it runs TrueCrypt and dismounts the encrypted volume.

Now, what do you do with it?

In my case when at work, I wanted to replicate "My Documents" with the PC. Within PStart, I setup an entry called "At Work." This entry invokes Allway Sync 'n' Go to sync "My Documents."

When anywhere but at work, I wanted to just use the "My Documents" on the thumb drive. Within PStart, I setup an entry called "At Home." This entry invokes Windows Explorer to explore "My Documents" on T:.

Here's what PStart's menu looks like.

Here're a few of the PStart configuration screens that make it look like I wanted it.

Tuesday, March 16, 2010

Bluetooth Tethering via BlackBerry Bold

Ever since I've inherited the BlackBerry Bold, I've fancied tethering a laptop to its 3G connection via Bluetooth.

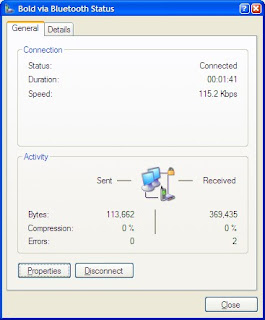
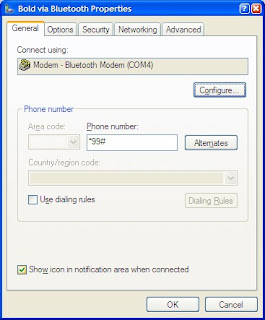
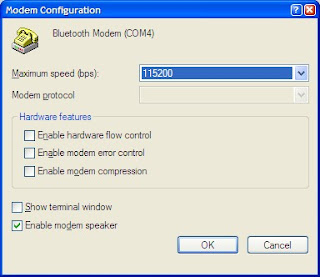
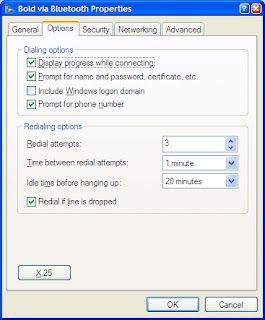
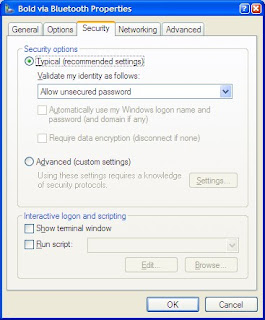
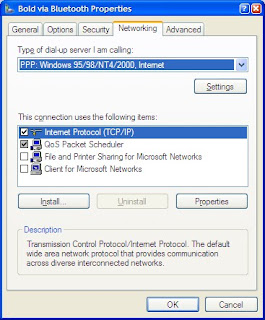
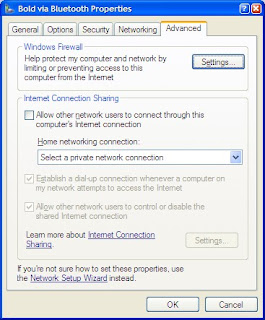
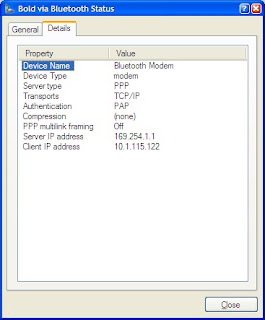
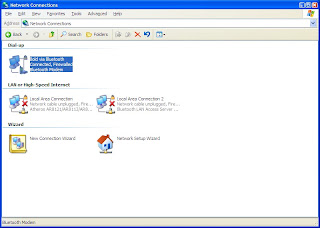
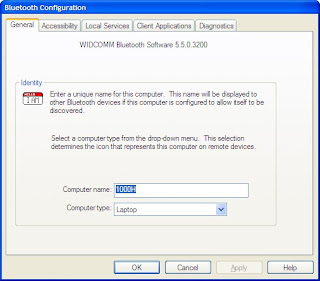
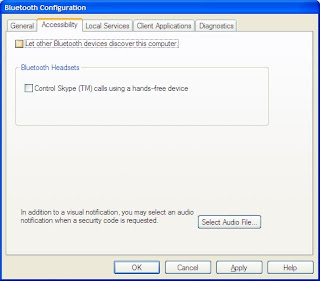
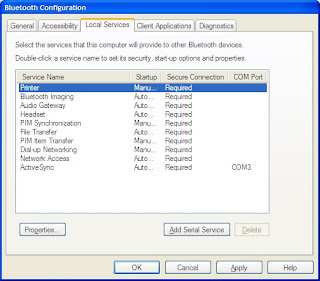
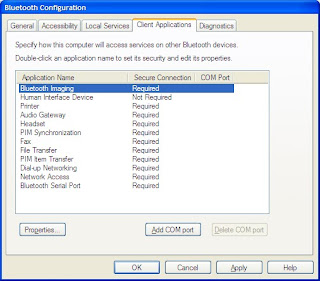
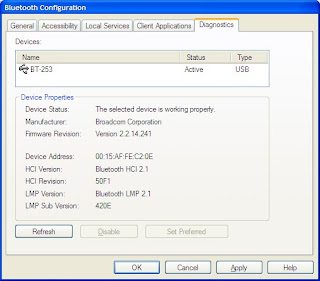
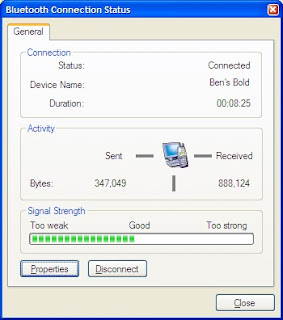
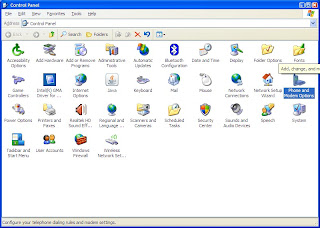
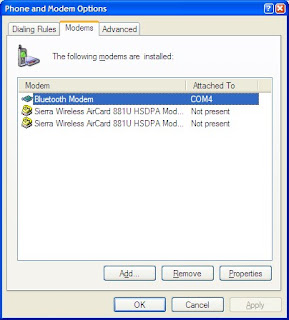
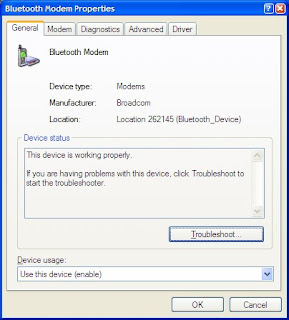
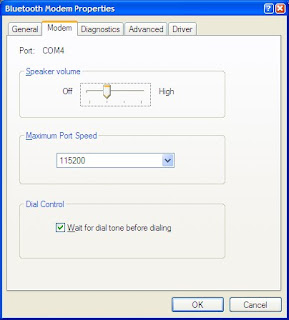
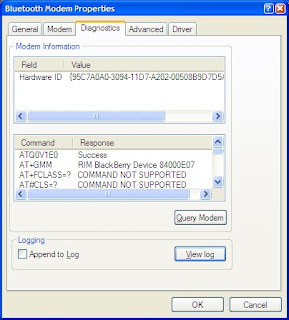
Recently I've tackled this and succeeded. To be honest, I hacked away at this off and on for months. I've referenced forum posts and blog entries all over that were very helpful. I can't give you a single step by step process to get there. What I can give you is a set of references and what my Bold and Asus Eee 1000H look like when I'm done and connected.

Pinstack Probably the most comprehensive
PortlandITGuy Good links to other sources
CrackBerry Not using Bluetooth

I didn't use the BlackBerry Desktop Manager nor the AT&T Communications Manager. While these may have made the process simpler, I didn't want the result to be dependent on another piece of software.

I also didn't add tethering to my AT&T plan. So far, I've only tethered to prove the concept. If I use this regularly I plan to add this $30/month feature.

This document doesn't cover pairing the 1000H and the Bold. That was routine and similar to pairing with a headset.

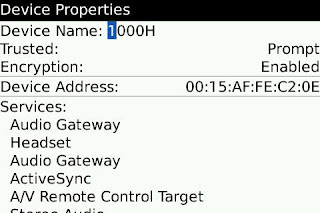
When I was done with the pairing here's what it looked like on the Bold.


By the way, I captured these BlackBerry screens with CaptureIT.

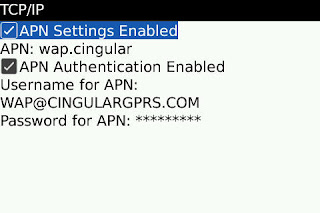
I didn't have to tweak any settings on the Bold.

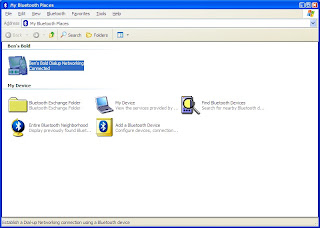
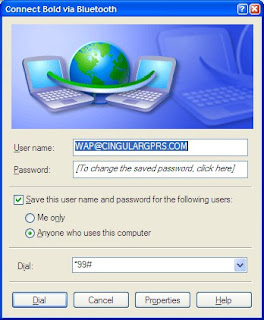
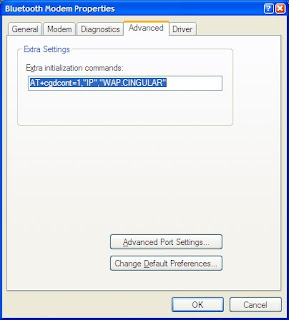
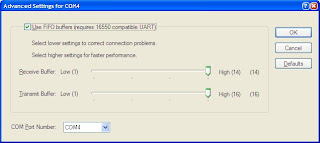
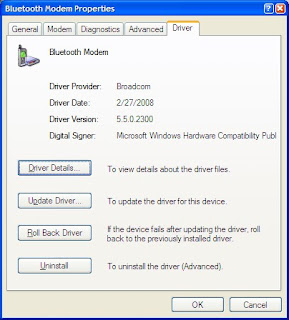
It's another story on the 1000H.


The password is CINGULAR1.


Uncheck all of these.


This is after I'd clicked on "Query Modem."

You have to set this!


Now that you've waded through all these screen captures, I'm sure you're dying to know "How's it work?"

Great!

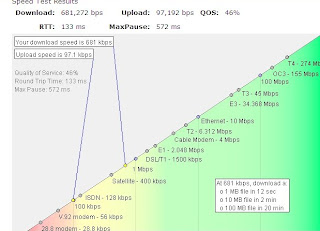
I don't have Flash on the 1000H so I used InternetFrog's speed test.

You can see that it showed almost 700kbps down and not quite 100kbps up. The QOS figure does NOT represent dropped packets but rather consistency of speed during the test.

Just to validate that test, I ran the same test on my ThinkPad connected via 802.11g to my (alleged) 3.0mbps AT&T DSL link. It tested at not quite 2.0mbps. I then retested the DSL using SpeedTest.net and got the expected 3.0mbps.

One way to read this is that InternetFrog is conservative or wrong. The other read is that SpeedTest is optimistic or wrong.

Regardless the Bluetooth tethering via the BlackBerry Bold ran somewhere between 700kbps and 1.0mbps down. That's very satisfactory to me. It feels quick.

If I left something out that you need, leave me a comment and I'll add it to the post.

Tuesday, March 09, 2010

VirtualBox

One of my goals for the Big Honker was to support virtual machines.

I had thought I would run VMware's ESX on the raw metal and then have everything virtualized under that. I found that this was very limiting, first in specific hardware support (after all it's really for servers) and second in support of USB devices being passed through to the virtual machines.

I compared VMware's Workstation to Sun's VirtualBox. Besides VirtualBox being free and VMware's Workstation costing $189, VirtualBox seemed to be more flexible and simpler, at least for what I needed/wanted.

VirtualBox's download and install was easy. It bounced the network (warning me first) to install its virtual network adapter in the TCP/IP stack. More on this a little later.

One of the first uses I tried was to install Windows 98 SE which is not officially supported. There is a good dialog on the VirtualBox forums about installing and running Windows 98. After holding my mouth just right, I got it to install but could never get it to access external data, e.g. CDs or USB drives. Perhaps I could have eventually overcome this.

But I moved on to just using Windows XP Pro. This is an officially supported environment. When I went to create the virtual machine, XP was on the menu. It gave me a recommended configuration and I was ready to go.

When I finished the normal XP install, there's a drop-down in the VirtualBox menu to install Guest Additions. These are software and device drivers that aware of the virtualization going on and enable some enhanced support, things like cursor focus being transparent.

With regard to getting access to external data, XP was much easier. I just set the network adapter to be bridged and the XP virtual machine appears to be on my local network. I can also assign any USB device to the virtual machine and it has complete access to it.

Access to the virtual machine is simple. VirtualBox has a built-in server for the Remote Desktop Protocol (RDP). This lets me invoke an RDP session from my laptop and go full-screen. It's like I'm there!

My next goal is to get my XP virtual machine where I want it relative to software, tools, and patches and then "clone" it. Then I can create cloned virtual machines from that base and play with them. There seem to be a couple of choices from simply duplicating the virtual hard drive to snapshotting and creating "differential" disks with just the changes from the snapshot.

This is fun!

Tuesday, March 02, 2010

Blackberry Remote Stereo Gateway

You know I'm an avid podcast listener.

A couple of posts ago I discussed my quest for a cable for my Bold. That has been working well but...

I wanted a less intrusive way to do this. I noticed that some Bluetooth hands-free units supported A2DP. That would let the Bold send the audio output to the hands-free which could then relay it to the car via an unused FM frequency. Interesting but complicated.

Then I came across the Blackberry Remote Stereo Gateway.
What this gadget does is provide a Bluetooth A2DP connection to the Bold and convert it into a 3.5mm jack that feeds the "Aux" jack on my car. All I have to do when I get in the car is press the "Pause" button on my Bold and the podcast starts playing through the car's speakers. I just leave the Blackberry Remote Stereo Gateway gadget in the console box where the "Aux" jack is.

The Blackberry Remote Stereo Gateway is powered by a mini-USB plug like almost all other Blackberry devices so I plug it into a cigarette lighter to USB converter in the console box. Incidentally, I have a cigarette lighter splitter in the console box! The cigarette lighter plug for the Asus Eee PC is in there too.