One of my co-workers uses LogMeIn Pro and does all his "work" on his home PC. That angle interested me but while I use LogMeIn Free for occasional remote access it requires a persistent application running on the target PC. And LogMeIn only uses a userid/password for access security.
I wondered if there wasn't something that I could do in my router. I discovered that dd-wrt supports SSH Tunnels (I don't agree with the "easy" adjective).
I decided that I wanted this SSH tunnel to "land" on a virtual machine on my home PC. That way I can closely manage what that "PC" has access to on my home network.
I found a refurbished Cisco E2000 for less than $40 that has a gigabit switch, 802.11N Wi-Fi, and supports dd-wrt.
I'm really big into portable apps that run from my USB drive so a friend pointed me to PortaPuTTY.
Configuring PortaPuTTY wasn't obvious to me either (hmmm, there's a pattern here) but with my friend's generous help I got it working!
One of the first things you need to do is to generate a key pair for the SSH session. PortaPuTTY has a key generator included.
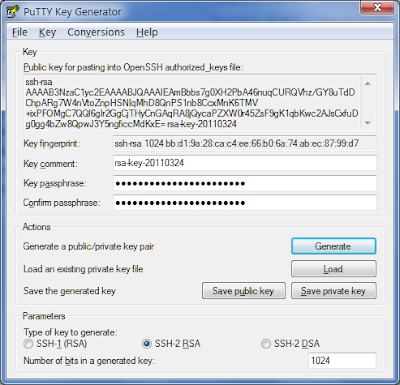 Notice that you also have to establish a passphrase so that even if you lose the USB drive you're still protected.
dd-wrt "support" is the typical open source support. They do miracles but communication is not their strong suite. I finally found the bits for my router and the flashing was easy. dd-wrt is certainly a very capable firmware and gives so much more information than OEM firmware.
To enable the SSH support in dd-wrt v24 and higher go to Administration/Management and enable "SSH Management" and put in a value for "SSH Remote Port." We'll use that later.
 Now go to Services/Services and scroll down to "Secure Shell". Enable "SSHd". Enter the port from above. Paste into "Authorized Keys" the key from PuTTY Key Generator.
 Be sure to click on "Save" at the bottom.
Then I put the private key in the PortaPuTTY folder on the USB drive. Whew! And we're just getting started.
Next in PortaPuTTY you'll need to set the "Host Name (or IP address)" for your home system. If you don't have a fixed IP address you'll need to use dyndns or something similar (dd-wrt has an embedded solution). For "Port" use the value for "SSH Remote Port" that you used in dd-wrt. I strongly suggest that you use a non-standard port.
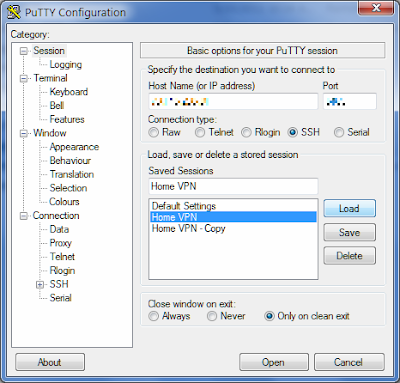 When you're done you'll come back to this screen and save the session information.
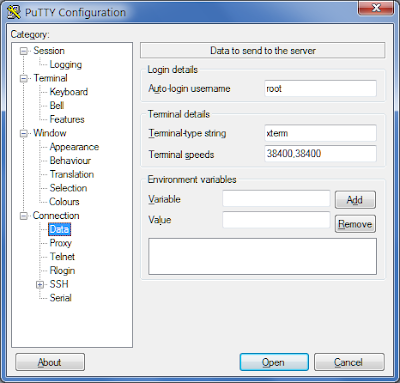
Next go down to "Connection" and "Data" and enter "root" as the "Auto-login username". This is required by dd-wrt's SSH support.
 Expand the "SSH" selection and click on "Auth". Click on "Browse" and find the private key file created above.
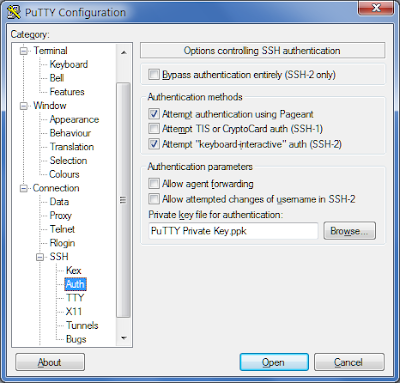 Click on "Open" and when you get back to this screen delete all the path information except the file name. That'll let you run this regardless of what drive letter is assigned to your USB drive.
Go down to the "Tunnels" section and put a port of your choosing in the "Port" field. I used 4444 but it doesn't matter much. In the "Destination" field, put the local address, e.g. 192.168.0.107, and a colon and then "3389". This assumes that the listening service on the target PC uses 3389 which is the default for Remote Desktop Protocol.
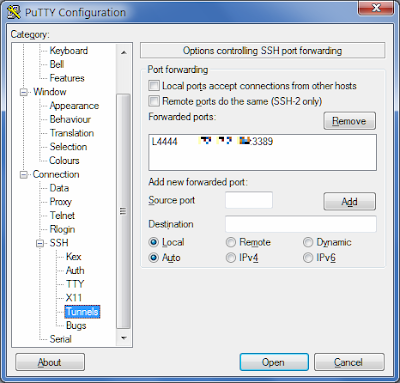 Click on "Add."
You don't need to change the RDP port number to a non-standard value because it is not advertised on the Internet, only to the LAN. The router's NAT firewall ensures that. You can change it if you want to.
I'm using Oracle's VirtualBox which allows you to have multiple VRDPs (Virtual Remote Desktop Protocols) running for different Virtual Machines. You do this by specifying VRDP ports for each one.
Note that the IP address here is the address of the PC running the Virtual Machines, not the IP address of the Virtual Machines proper. This is because the VirtualBox service offers the VRDP sessions for the Virtual Machines. Whew again!
Don't forget to go back to the first screen and save this session configuration. Incidentally the reason that PortaPuTTY is portable is that it saves the session information in the .putty/sessions sub-folder.
At this point I go into the PortaPuTTY .putty/sessions sub-folder and mark that session file I just created as read-only.
Next you'll need to create a RDP profile. Go to Start/All Programs/Accessories/Remote Desktop Connection.
In the first screen put "localhost:4444" or whatever port you specified above.
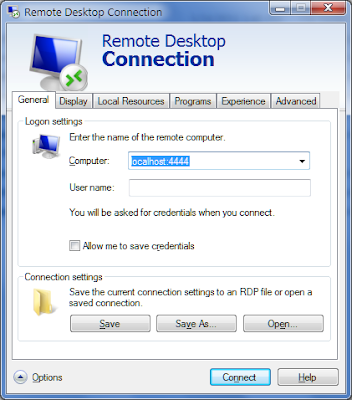 The following screens are my other settings. You may have your own preferences here.
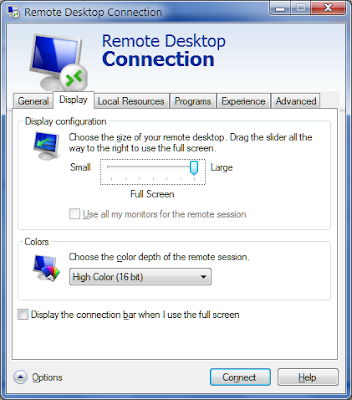
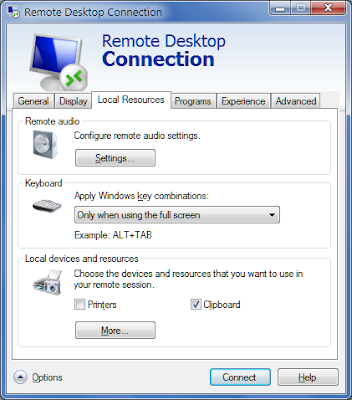

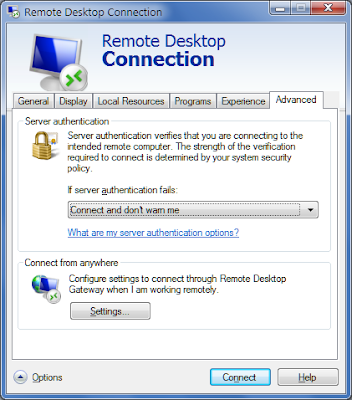 Remember to go back to the "General" tab and save the profile in the PortaPuTTY directory. Click the red "X" to close this.
I still use PStart to manage my USB drive.
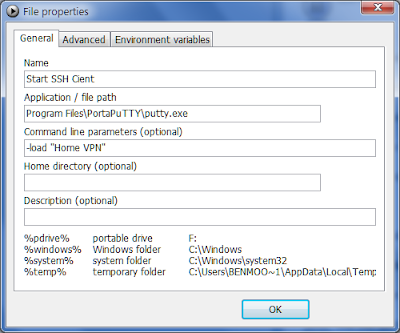
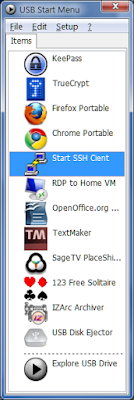 Here're the parameters I use for the SSH entry.
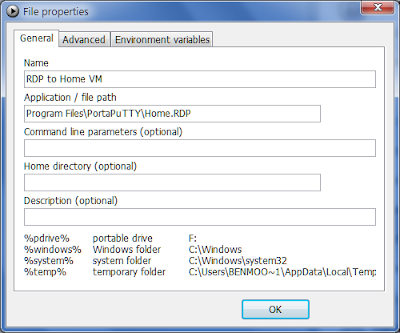
 And for the RDP session.
 Go to the PStart menu and double click on the "Start SSH Client" entry.
You'll get this screen. Enter the passphrase you created above.
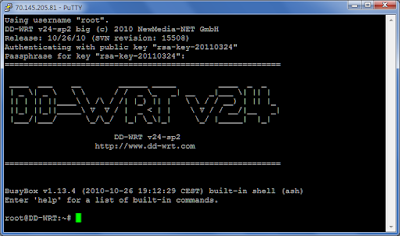 Now go back to PStart and double click on the "RDP to Home VM" entry.
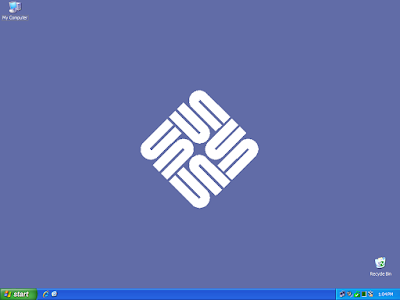 When you're done with the SSH session, close the RDP session. Go back to the SSH window and enter "exit" and press Enter.
Remember that your speed is limited to the home's upload speed. For me that's AT&T's DSL Xtreme 6.0 at 512 Kbps (yeah, right).
Good luck.
Thanks to splashup for the image editing for this post.
1 comment:
HI,
thank you very much for this howto - you saved my day :-)
MAX
Post a Comment